 T w e n t y S i d e d
 |
I think I’ve accomplished everything I set out to do when I started this project. I have an attractive terrain engine that runs well even on a two-year-old computer, and which leaves plenty of memory and CPU power for whatever game I might want to add.
From here, I may modify the engine and try to put it to use, but if I do it will be a seperate series.
There were several items I had left for this final post, but most of them were not part of the engine itself and would make for even duller reading, if such a thing is possible.
Stuff I learned:
- An overhead engine is far, far easier to make than a first-person engine. This was easier than I’d anticipated. I imagine the real challenges of such an engine appear when you start putting foliage on it.
- A lot of camera movement limits I’ve encountered in games probably exist due to engine limitations, and not because the designers wanted to annoy the users. I’m thinking back to the original Black & White (the link goes to B&W 2, the original website just redirects to the sequel. Jerks) and the way the overhead camera was always tethered to the ground in such an annoying way. At the time I thought it was just a poor interface, but now I see it was probably a way to keep poly count under control. I found limiting the camera movement speed covered a multitude of shortcomings.
- Making a lot of textures on the fly is much faster than I expected. I cranked the number of distinct terrain textures to 1,024 and I was still able to turn them out fast enough to keep up.
- In the future, I need to set more specific goals for projects like this. Without any guiding design, I felt a lot of my choices were arbitrary when confronted with various tradeoffs. For example, I never decided ahead of time how fast the user should be able to move around the landscape, how high or low their viewing angle was allowed to be, how far they should be allowed to see, or even what scale I was dealing with. Many games put limits on stuff like this, and deciding those limits ahead of time (or at least having an idea of how I wanted the interface to work) would have given me more to go on.
- Agonizing over polygon counts with modern graphics hardware is often time poorly spent. It’s better to give the CPU a break, even if it means being sloppy and letting the GPU (your graphics card) pick up the slack.
- The method I came up with in Part 6 for casting shadows is really fast, and a nice trick. I’ll have to remember that one.
- Making an engine that can churn out good-looking rolling hills that are visible to the horizon is still a major challenge. It’s easy to come up with a couple of “square miles” of terrain, but reaching the horizon is very hard. Most games have fake mountains in the distance. Far Cry fixed this by setting the game on small islands, making the horizon all water. Flight simulators make the ground very simple up close. I think we’re still a little ways off from true expansive terrain that can be explored on foot.
- Recording a project like this was useful. It was time-consuming, and probably wouldn’t make sense if I was actually making a game, but for an educational project like this it gave me a good look at what worked and what didn’t. Even better, it gave me a chance to learn from others who took the time to leave some very interesting comments.
UPDATE 2/25/2006: In response to inexplicable public demand, I have since released the source code. So, if you have some skill in C++ you can experiment with the code yourself.
Thanks for reading.
Shamus Young is a programmer, an author, and nearly a composer. He works on this site full time. If you'd like to support him, you can do so via Patreon or PayPal.
The Best of 2011

My picks for what was important, awesome, or worth talking about in 2011.
Best. Plot Twist. Ever.

Few people remember BioWare's Jade Empire, but it had a unique setting and a really well-executed plot twist.
Push the Button!
Scenes from Half-Life 2:Episode 2, showing Gordon Freeman being a jerk.
DM of the Rings
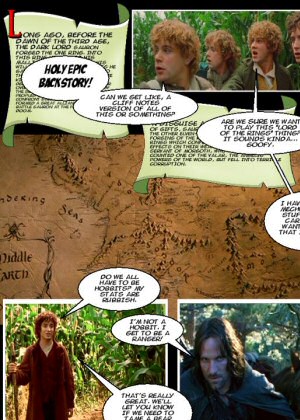
Both a celebration and an evisceration of tabletop roleplaying games, by twisting the Lord of the Rings films into a D&D game.
Chainmail Bikini

A horrible, railroading, stupid, contrived, and painfully ill-conceived roleplaying campaign. All in good fun.
Awesome read! I enjoyed every part!
Any chance you’d make the code available? I’d love to see how it came together behind the scenes.
That hadn’t occoured to me. I don’t see any reason why I wouldn’t. I’m onto another project now, but maybe this weekend I’ll get the code together and post it.
i too am would love to see the code of how u did this…and if so can u send to my email [email protected]
Awesome! I learned quite a bit reading through this. Can’t wait to see how the code works!
Just want to throw my hat in the ring and also say I’d be interested in looking at the code if/when you make it available.
Okay, the source is now available. Good luck with it.
Regarding the comment that terrain to the horizon that you can walk on isn’t there yet: The game There (http://www.there.com/) has terrain out to the horizon, and launched in 2003. You can walk anywhere without zoning, and actually drive around the world (although it’ll take you three weeks to do so non-stop!)
Terrain generation is also something I’ve spent some time on. My additional hangup is that I want “infinite” terrain. Well, strictly speaking, not infinite because that isn’t realistic anywhere. But a roughly Earth-sized hunk of terrain would be good.
To get there, I’ve played with Perlin noise generators. My attempts have had various problems, at least one of which being that I think I made my Perlin generator wrong… To try to overcome that, I ran across libNoise (http://libnoise.sourceforge.net/), which actually has a pretty cool randomly generated planet as part of its tutorials. They generated the whole thing beforehand, but since this is Perlin noise based, you can create it a tile at a time as you need it (my engine worked that way).
I didn’t use the coplanar simplification system you mentioned, largely due to trying to see how far I could get on my own. Since I was generating tiles as I needed them, I generated them at a physical resolution appropriate to their distance from the camera. Tuned properly, I was able to get landscape to the horizon for walking on. Now, my requirements are lower — I like non-action RPGs, so a framerate of 12-15 is acceptable to me, especially if the world can be better. Of course, I still needed to do a _LOT_ of work on that engine, because it didn’t have plants, buildings, people, scripting, etc.
One thing I did start using that helped me a lot (once I got the bugs out of it) was vertex buffers. You described using triangle fans (I used strips, because my terrain was fixed grid spacing within a tile, and it let me really re-use vertices a lot). If you also use vertex buffers, it means that even when you do need to re-use a vertex, you only have to transmit one integer index instead of three coordinates. Even with my triangle strips, I had to re-use vertices along the stitched edges of the strips (each point used twice), and the vertex buffer cut my data throughput by a factor of three for those re-uses.
If you actually grind that all out, just looking at position, it doesn’t look so impressive:
3 floats for the vertex in the buffer.
1 integer for the original use
1 integer for the second use
Still gives me 5 values, and doing it directly only needed 6.
But the real benefit comes from the other values that are vertex based, and from the computational help that you are giving the GPU. Vertex buffers can also hold colors, surface normals, texture coordinates, and anything else you need attached. Let’s see how that plays out:
With vertex buffer:
3 floats for position in the buffer.
3 floats for color in the buffer.
3 floats for normal in the buffer.
4 floats for texture coord in the buffer.
(assuming one texture using something like your dynamic generated textures, and a second detail texture to break up those close up blocks you mentioned)
1 integer for the original use
1 integer for the second use
Total: 15
Without vertex buffer:
3 floats for position in first use.
3 floats for color in first use.
3 floats for normal in first use.
4 floats for texture coord in first use.
3 floats for position in second use.
3 floats for color in second use.
3 floats for normal in second use.
4 floats for texture coord in second use.
Total: 26
So, not quite half as much data, but definitely significant. Oh, and the computational help to the GPU comes from the fact that the GPU can pre-transform all of the vertex positions and normals when you send the buffer, so it only has to do half as many 3D perspective transforms (the second use comes free)
There are actually higher levels of pre-packaging, but display lists and vertex buffers were about as far as I got.
Great article, and I definitely want to play with your “shadows in the textures” and “texture blending in the textures” ideas. I’m a big Morrowind fan, and they used blending of textures, and one of their problems was that if you ever got more than a few textures bumping into each other, the system just choked and drew a hard line between clusters. Your system should overcome that problem.
(I’m also enjoying DM of the Rings, which was how I first stumbled across your blog, and then I found this project. Very cool.)
Keep up the good work!
Mac
(Sorry for posting here in the older stuff — guess I should’ve gone into the feedback post, but since I’ve started…)
The other approach, especially once you’ve gone tiled and noise-generated, it to really dive into vertex programs. It should, theoretically, be possible to make a single terrain mesh that was deformed by a vertex program based on a few variables to give it location. The basic form would be to make square tiles of various resolutions and let them generate themselves in place.
But, you could go way down this path and use a _single_ mesh. This would be basically a flat triangular plane with decreasing density as you leave the “I am here” vertex and approach the “horizon” edge. When the character moved, neither the camera nor the mesh would actually need to move. You would send parameters to the GPU for “camera position” and “camera facing”, and the vertex program could run the Perlin generator for each vertex in that mesh, as it drapes over the underlying noise field. In theory, this would seem to provide perfect continuous level of detail (CLOD) terrain. Of course, if you get too stingy on your polygons in that mesh, you’ll have the “melting landscape” problem that most CLOD implementations I’ve seen seem to have.
I’ve never tried this, so I wouldn’t be surprised at all if it turns out to actually be harder than I think it would be. But if it isn’t, that could be a very cool way to render landscapes (especially on the new 8000 series, where you could also do all your lighting and texture munging in fragment programs and still have lots of GPU time left over)
Mac
Sorry, something I meant to mention above and forgot — the single triangular mesh approach may introduce some fairly serious “look up and down” issues… It seems like you could still rotate the camera up and down, you just let the terrain generation deal with rotating the camera left/right or moving the camera. I started to say that it knocks out the ability to lean left/right (non-perpendicular viewpoint), but that isn’t any more of a problem than the up/down issue. Hmmm… Need time to experiment.
Thanks for your thoughts on this. Very interesting. I may be jumping back into this project in a month or so, so it was great to read this.
Very great series of articles !
Thx for sharing all your experience with us, poor programmers :)
Simply the best tutorial i’ve ever read (and that’s a lot!). 10/10.
Yep, even for me that’s allergic to programming this explanation as well as others thoughts was a kick forward in knowledge :)
cheers
Yoron.
This was a really good read.
Thanks!
I’m not really involved in coding anymore (since the days of BlitzBasic on the Amiga), but I’m still interested in it; and this has opened my eyes a little to the workings of 3D engines.
Good work!
This is really an awesome article. I enjoyed reading every part. Keep up the good work. Thanks a lot for all your hard work.
Although this article is quite old now, I’ve just stumbled across it and thought I’d point out a few suggestions:
1) Look at using vertex buffer objects (VBOs) instead of display lists as this stores the vertex information in GPU memory when available. From what I can remember this feature is available on even quite old cards. This is a simple extension to vertex arrays.
2) Use hardware mipmapping for your textures. It will greatly improve the quality of your scene and in most cases will boost your framerate. This is all in the sacrifice of GPU memory though.
3) A better approach for the lighting would be to store separate textures with lightmaps and then use multitexturing to blend the two together. This way you can recalculate your lighting without having to redo any texture blending calculations.
4) If you are interested in the texture blending issues in terms of memory, have a google for ‘texture splatting’. There are some interesting techniques out there.
James
While learning OpenGL I thought it would be cool to make something similar like this
http://www.youtube.com/watch?v=Y87IyE2d-IA
No real textures or anything, I did use your method of shadow-casting (without looking at the actual code, your description is great) and none of that fancy optimization stuff. The terrain data is generated on the fly using simple perlin noise.
I’ve figured out why I like Let’s Plays. I enjoy watching capable people do things they’re good at.
(i also enjoy watching volatile people go crazy doing hard stuff, a la I Wanna Be The Guy – this is not that)
Thanks for this series! I really enjoyed it a lot.
Thanks for sharing your experience with terrain generation stuff… I knew some of it, but learned quite some as well…
Your explanation skills are great :]
I am learning the terrain programming recently and your articles are really fabulous.Thanks for sharing the source code. I think if you would share the code by part would be great. Because it makes the learner to follow your steps to reach the final and it is more easy for them to understand the code. Anyway, it is wonderful.
Thank you for posting this article. I learn a lot about terrain rendering from you techniques. I am looking to port the codes to OpenGL ES 2 to run on mobile devices but while taking advantage of VBO and shader programs. I am new to OpenGL and has difficulties porting the codes.
Has anyone ported the code to using shaders and vertex array/VBO instead of the fixed pipeline? If yes, is there a significant performance increase?